
Retaining walls rarely give way overnight. In most Sydney yards, the trouble starts with hairline cracks, a slight outward lean or patches of soggy soil that never seem to dry. Ignoring those hints can turn a simple cosmetic touch-up into a complex structural job that tears up your garden and drains your budget. This guide walks you through the tell-tale signs, how Sydney’s clay and sandstone soils influence wall movement, and when it is time to call for professional retaining wall support instead of grabbing another bag of quick-set mortar.
Why Early Detection Matters for Retaining Walls
Minor wall issues are cheaper and simpler to handle than full structural failure. When small cracks stay dry, drainage works and the footing remains steady, you can often stabilise the wall with targeted reinforcement. Leave the same wall unmonitored through one Sydney storm season, however, and water pressure behind the wall can double. That not only pushes the structure outward but also saturates the soil, creating slip zones that threaten nearby paving, fences and even your home’s foundations.
Early detection lets you:
- Limit excavation to troubled sections instead of rebuilding the whole length
- Preserve established plants and turf in front of the wall
- Avoid urgent council approvals that may apply once a wall reaches a certain height or safety risks
- Keep neighbours on side by fixing stormwater runoff before it floods adjoining properties
Common Causes of Retaining Wall Distress in Sydney Soils
Sydney’s geology changes block to block, so two seemingly identical timber walls can age very differently. The usual culprits include:
Reactive clay pockets
Western Sydney suburbs such as Penrith and Blacktown sit on clays that swell during heavy rain and shrink hard in drought. That constant heave places cyclical pressure on wall footings.
Sandstone shelves
Along the North Shore and Eastern Suburbs, shallow sandstone can prevent footing piers from embedding deeply enough. A wall that looked solid at installation may start rocking once the first wet season washes away finer fill.
Poor drainage design
Perforated agricultural pipe or scoria backfill is non-negotiable. Without it, hydrostatic pressure builds rapidly after summer downpours and pushes the wall outward.
Tree root intrusion
Gums and figs chase moisture trapped behind walls. Their roots pry open joints, lift capping and channel even more water against the structure.
For readers needing a deeper dive into design options, our explainer on what the different structural types of retaining walls mean for your yard outlines gravity, cantilever, crib and anchored systems in plain English.
Spotting the Warning Signs: Minor vs Serious
Some symptoms look dramatic but are easy to arrest; others appear harmless yet signal deep-seated problems. Use the table below as a first-pass triage:
| Situation | Likely Cause | Usually Safe to Monitor? | Action Window |
| Hairline vertical crack under 2 mm, no damp | Normal shrinkage of mortar or timber | Yes, if width stays stable for 3–6 months | Photograph, re-check after heavy rain |
| Repeated weeping stains or efflorescence | Poor drainage, water pressure | Often temporary only if stains stop quickly | Improve drainage, check again in one wet season |
| Outward lean under 5 degrees, all posts still plumb | Minor footing movement or timber shrinkage | Short-term monitoring possible | Install braces, review yearly |
| Crack wider than 5 mm and widening | Active soil movement or footing failure | No | Engage structural landscaper within weeks |
| Bulging section between posts | Hydrostatic pressure behind wall | No | Relieve pressure, partial rebuild likely |
| Sudden soil escape through gap | Erosion or rotted timber | No | Secure area immediately, plan rebuild |
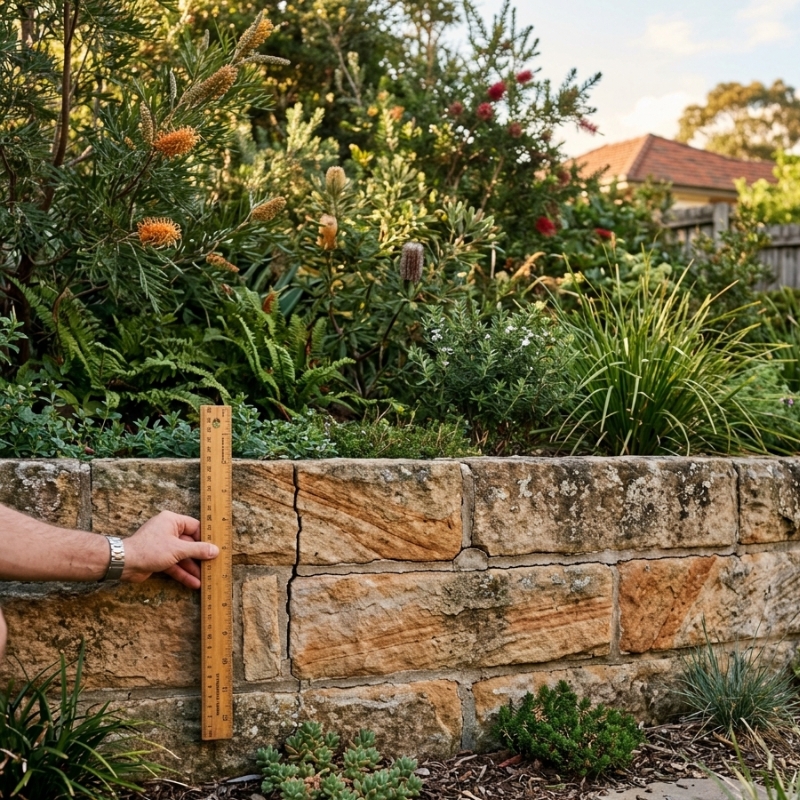
A smartphone photo with a ruler or coin for scale is enough to track gaps accurately. Label each image with the date and weather conditions so patterns emerge.
Quick Homeowner Checks You Can Do Safely
Before picking up any tools, spend 20 minutes completing these four at-home inspections:
- Plumb-line test – Hang a string with a weight from the top of the wall. Measure the gap between the string and wall face at the base. More than 10 mm on a 1 m-high wall may indicate leaning.
- Soil moisture squeeze – Dig a small test hole in the backfill. If the soil can be balled and stays together after moderate squeeze, excessive water is present.
- Surface drainage flow – Hose the garden bed above the wall for one minute. Watch where water collects and how fast it disappears through the weepholes. Slow run-off hints at blocked drainage.
- Cap stability tap – Gently knock the wall’s capping stones or timber sleepers with a rubber mallet. A hollow sound suggests voids beneath, while movement means mortar or nails have failed.
Record your findings and set a calendar reminder to re-check in three months or after the next extreme weather event.
When Monitoring Is Enough and When Action Beats Waiting
Every retaining wall sits somewhere on the wear-and-tear curve. The decision to watch, repair or replace depends on size of movement, rate of change and risk to nearby structures.
The 3-Stage Decision Framework
- Stage 1 – Stable & Cosmetic
- Fine cracks, no leaning, drainage working
- Safe to clean out joints, patch and repaint
- Stage 2 – Progressive Movement
- Widening cracks, slight lean or intermittent bulging
- Reinforce posts, improve back-drainage, add tie-backs
- Stage 3 – Structural Failure Risk
- Rapid lean, footing displacement, soil loss or water bursts through wall
- A sectional or full rebuild is usually required
A professional will confirm which stage applies by sighting wall ties, footing depth and soil samples.
DIY Fixes That Often Backfire
Plenty of weekend warriors attempt quick tricks that end up costing more:
- Filling cracks with concrete glue only – Locks water inside timber or masonry, accelerating rot and freeze-thaw damage.
- Adding a second skin in front of the wall – Masks, rather than relieves, the pressure. The hidden cavity quickly fills with water.
- Dumping extra soil behind the wall – Increases loading without improving retention strength.
- Blocking weepholes to stop leaks – Forces water to find another, often destructive, escape path.
Instead, treat the underlying cause first: drainage, footing failure or structural fatigue.
Professional Assessment: What to Expect
A reputable landscaper or structural engineer will:
- Review your photo log and measurements
- Excavate small inspection pits to check footing depth and soil profile
- Use a level or laser to measure wall lean accurately
- Recommend staged fixes where possible, starting with drainage improvements or tie-back installation
- Provide written findings that can be submitted to the council if approval is required for significant rebuilds
Expect the visit to take 1–2 hours for average suburban walls. Where trees or neighbouring structures complicate access, allow longer.
Compliance and Safety Considerations in NSW
In New South Wales, any structural wall over 600 mm or one that retains a surcharge (for example, a driveway or building) generally falls under the Home Building Act. That means licensed building work, and proof of adequate waterproofing, footing design and drainage. For the latest height and licence thresholds, see the guidance from NSW Fair Trading. Non-compliant walls can void some home insurance clauses if failure damages adjoining property, so checking early protects both safety and finances.
Frequently Asked Questions
1. Will my retaining wall definitely need council approval if I rebuild?
Not always. In many Sydney LGAs, walls under 600 mm that are not close to boundaries may be exempt. However, add height, terracing or a pool nearby and approval is likely. Confirm with your local council’s Development Control Plan before starting work.
2. Can I drill extra weepholes to relieve water pressure myself?
You can, provided you know the wall’s construction. Drilling through reinforcing steel in a concrete wall can weaken it, and puncturing waterproof membranes behind masonry may introduce new leak paths. If in doubt, ask a professional to core-drill correctly sized weepholes and fit filters.
3. How quickly should a widening crack be addressed?
Measure weekly during wet periods. If a 2 mm crack grows to 4 mm within a month or you notice fresh soil bleed, move from monitoring to professional assessment straight away. Slow, stable cracks can sometimes be watched over one full season.
4. Are timber retaining walls inherently weaker than masonry?
Not necessarily. Treated pine or hardwood walls perform well when posts are embedded deeply, drainage is adequate and capping is protected from UV. Premature failure usually stems from poor installation rather than material choice.
5. What temporary measures can I take before a professional visit?
Clear blocked weepholes, divert roof downpipes away from the wall, and install a shallow swale or ag-pipe to channel surface water. Avoid stacking sandbags directly against the wall face, because added weight can worsen the lean.
Final Thoughts
A retaining wall is like any safety-critical element of your landscape: small signals matter. By logging cracks, checking drainage and acting before movement accelerates, you keep repair options open and costs contained. If your measurements show widening gaps, bulges or sudden soil escape, seek expert advice early rather than gambling on a patch-up. An informed homeowner makes better choices, whether that is a simple brace today or a full rebuild down the track.